
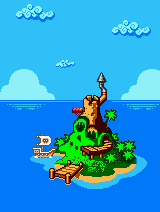
Tinkerbat Factory, is located in Risky Boots's Island Hideout. It is Risky's base of operations, located on an island in an unnamed sea somewhere northwest of Scuttle Town. It is the game's last labyrinth.
To gain access, Shantae must acquire and then subsequently de-acquire all four Elemental Stones, and then follow the trail of clues to the location of the Spy Scope, floating high above the desert sands. The Spy Scope will look into her heart and gauge her intentions good, then teleport her to the island. The return trip is also possible, by walking into the light cast by the Spy Scope.
Unlike all the other dungeons it is quite linear but full of Tinkerbats and their steam-powered creations. It contains the four ancient treasures (
,
,
,
) and the
, which are being used to power Risky's new weapon, the Tinker Tank. After dealing with the tank, Shantae will have to face Risky Boots, then escape the island before it explodes.
Bosses[]
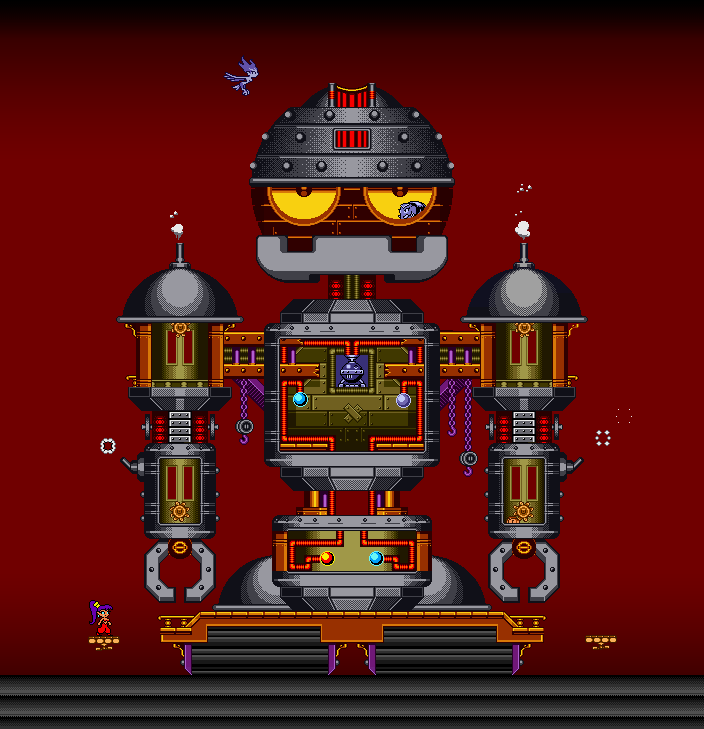
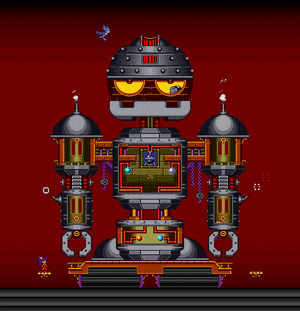
This thing is massive.
All-Purpose Steam-Powered Tinkerbot[]
The All-Purpose Steam-Powered Tinkerbot, aka Tinkertank is the culmination of the Tinkerbat's efforts with the Steam Engine and the four Elemental Stones. Risky built it to rule the land as she does the seas. The Tinkertank is a large version of the regular-sized Tinkerbots that the Tinkerbats are found operating throughout the factory. Fortunately, it does not appear to be fully operational, and can easily be destroyed by the following method:
- Fly up to the Tinkerbot's head (avoid the steam vents) and fall inside. From its chest chamber, transform into the monkey and get into its arms. At the top of each arm is a gear - attack this to expose the Dribble Stone (left) and Golem Stone (right) in the robot's chest.
- Attack the two stones until they are destroyed. Once this is done, the chamber further down the arms will open.
- Go into the two arm chambers and destroy their mechanisms as you did the previous ones. Doing this revealed the Sizzle Stone (left) and Twinkle Stone (right) in the robot's gut.
- This will open the Steam Engine container in the chest. Attack it until it explodes, destroying the entire thing.
Although the Steam Engine is utterly obliterated, the Tinkerbats id not loose the secrets to its construction, as the Steam Powered Oceanic Tinker Tub in Risky's Revenge is a testament to.
Risky Boots[]
As you probably could have guessed, Risky is the true final boss. She has two stages and is easily the most difficult boss of the game. Ideally, you want to approach this battle with as many potions and magics as possible, and you want to be sure to end the battle with a decent amount of health because there is an escape sequence you'll need to survive, and you won't be given the opportunity to heal after the battle.
Stage 1[]
She has a variety of moves:
- Charge
- Risky charges forward. Not altogether fast. This is easily avoided by jumping.
- Diagonal Air Dash
- Risky flies around in the air. Generally keeping away from the center of the room seems to do the trick in avoiding this.
- Gun Barrage
- Risky pulls out her little pirate pistol and fires a volley of bullets. This one can be avoided by crouching, or by being in the Monkey form.
- Jump
- Risky will jump through the air across the room. This is her fastest 'attack', and it happens without warning. You are better off avoiding jumping around unless it's specifically to avoid another attack, because once you're in the air there's no dodging her if she decides to do this one.
In order to damage Risky, you have to hit her when she lowers her guard and laughs. She does this for a brief period of time between attacks. You can try to keep close to her during her attack so you'll be able to score a quick hit when she lowers her guard afterward, or you can fire magic attacks from across the room at her. My favorite technique is to use the Monkey form to scamper around quickly, run under bullets and score easy hits with the Monkey Claw.
Stage 2[]
Risky is now in a bad mood. She's lost her hat, and her hair looks kinda frazzled. She's not her mirthful gloating self anymore. She attacks similarly to before, but faster, and is vulnerable for less time between attacks. She has a few new moves:
- Boomerang
- She telegraphs this move pretty blatantly so you'll know it's coming. Run away from it or jump over.
- Sword Charge
- A much faster move than her regular Charge. Jump over her, as before.
She is less vulnerable. Another thing: If you stand against the wall when she charges, she will hit it and get damaged. She will also jump away immediately afterward, so you'll have to time and position your jump in preparation for this so that you are not hit.
Escape[]
The volcano begins to erupt from all the commotion. Shantae can easily fly out but you'll have to dodge lava jumping up at you. It's pretty easy to tell where the lava is going to appear next, and for the most part, you're safer standing still until you see it bubbling up beneath you.
After a short while, you'll complete your escape. Although Risky's fate is meant to be ambiguous, if you look carefully you might notice her boat is absent from the island in the cutscene that follows. Dun dun dunn! But the next game is called Risky's Revenge not Risky's Absence so, you know, not a big surprise.
Gallery[]
_428.png "Shantae (USA) 428.png (5 KB)")
_432.png "Shantae (USA) 432.png (6 KB)")
_398.png "Shantae (USA) 398.png (6 KB)")
_408.png "Shantae (USA) 408.png (5 KB)")
_444.png "Shantae (USA) 444.png (6 KB)")
_500.png "Shantae (USA) 500.png (5 KB)")
| ||||||||||||||
| ||||||